How to stop on a snowboard
Learn simple, reliable ways to slow down and stop with control.
Beginner skills
Heelside and toeside
To turn on a snowboard, look where you want to go, let the board flatten, then tip it onto the new edge by leading with your front foot, and let it come round across the slope. Build it in small steps, from single turns on each edge to smooth, linked S-turns.
At a glance
Before this guide
Turns build directly on stopping, so make sure that feels reliable first.
Every turn starts on one edge and finishes on the other, so learning how to turn on a snowboard only works once you can already control each edge. Before you start, check that you can:
Turning is the step in our beginner snowboarding roadmap where it starts to feel like real riding, so it is worth being patient with the basics. Choose a wide, gentle, groomed run with a flat run-out, ideally in the beginner area. An instructor will pick terrain that matches your skills and give you instant feedback, which makes this stage much faster and safer.
A useful bridge between stopping and turning is the falling leaf: while sideslipping on one edge, you shift your weight gently toward your front foot so the board drifts forward across the slope, then toward your back foot so it drifts back. You stay on the same edge the whole time, but you are already steering the board by moving your weight.
Start with single turns on each edge, ending across the slope.
A J-turn is a single turn that starts with the board pointing gently downhill and ends with it across the slope, so you slow down and stop. It looks like the letter J in the snow, and it lets you practice one edge at a time.
Most people find one side easier. Spend extra time on the harder one. You will need both to link turns in either direction.
Flatten the board, then tip it onto the new edge, led by your eyes and front foot.
Edging means tilting the board so one edge grips the snow; steering is what happens when you change that tilt and twist the board a little. An edge change is the moment the board rolls from one edge, through flat, onto the other, and it is the heart of every linked turn.
PSIA Northwest’s snowboard progression template sums the idea up as “use twist not pivot”: a gentle twist of the board, started from the front foot, rather than swinging the whole board round with your upper body. We find that letting the board’s edge and shape do the turning is smoother and easier to control. The same template builds skills in three stages, a static exercise, then a directional sideslip or garland, then the edge change, which is the order this lesson follows.
Join your turns together so one flows into the next.
When single J-turns on both edges feel steady, you are ready to link turns on a snowboard.
Keep your runs short at first, and look well ahead so you can plan your next turn and avoid others. When linking feels reliable on the beginner slope, and your instructor agrees, you can start using the lift for longer runs. Our guide to riding chairlifts and T-bars walks you through it.
Practice goals
Checking a box records your practice. Ask your instructor when you are ready to progress.
Common questions
Start with single J-turns on each edge on a gentle slope. Look where you want to go, flatten the board, then tip it onto the new edge, leading with your front foot, and let it come round across the slope to slow down.
You tilt the board onto an edge by moving your ankles, knees and hips: lift your toes to put it on the heel edge, or press your shins forward and lower your heels slightly for the toe edge. More tilt means more grip. Start with small, smooth movements on gentle terrain.
Ease off your current edge until the board is flat, then tip it onto the other edge, front foot first. Keep your knees flexed, your weight centered and your eyes looking into the next turn.
Keep the downhill edge out of the snow when sliding sideways, stay centered, and change edges smoothly when the board is pointing more downhill rather than across the slope.
A drill where you sideslip on one edge and shift your weight between your front and back foot so the board drifts forward and backward across the slope. It teaches steering before you change edges.
You face uphill and cannot see as easily where you are going, so many people reach toward the snow. Stand taller, press your shins into your boots and keep your eyes up.
Up next
Learn simple, reliable ways to slow down and stop with control.
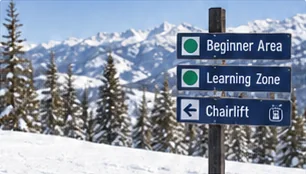
Load, ride and unload chairlifts and surface lifts on a snowboard.
Move from skidded turns to clean, carved turns on the edge.