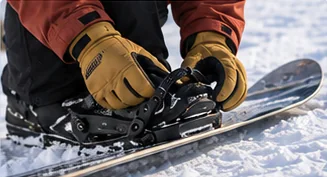
How to adjust snowboard bindings
Fine-tune angles, stance width, straps and forward lean.
Gear guide
Mount first, then fine-tune
To set up snowboard bindings, confirm they fit your board’s mounting pattern, place each binding on the correct side, then screw them down by hand in a cross pattern using only the hardware that came with them. Fine-tuning the fit to your boots comes after.
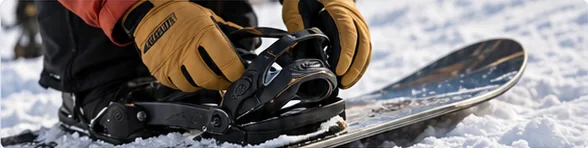
At a glance
Before this guide
The whole job at a glance, before the detail.
Setting up snowboard bindings, or putting a snowboard together for the first time, comes down to five steps:
This page covers mounting and removing the hardware. Once the bindings are on, our separate guide to adjusting angles, width, straps and forward lean walks through the fine-tuning.
Confirm the board, bindings and boots are made to work together before you touch a screw.
Burton’s binding mounting guide describes the main mounting systems you will find on boards today and on older second-hand boards:
| System | How Burton describes it | What to check |
|---|---|---|
| 4x2 (also called 2x4) | Two rows of holes 4 cm apart, with holes in each row 2 cm apart; a very common pattern | Most disc bindings include hardware for it |
| 4x4 | An older pattern with rows 4 cm apart and holes in each row 4 cm apart | Confirm your disc lists 4x4 |
| 3D | Holes in overlapping triangles, with three screws per binding | Needs a 3D-compatible disc |
| The Channel | Two aluminum tracks, two screws per binding, with almost unlimited positions | Channel hardware for disc bindings, or EST bindings |
Burton’s own disc bindings use a Re:Flex disc that works with several patterns, while its EST bindings are designed specifically for The Channel. Burton also notes that EST hardware comes in M5 and M6 versions to suit older and newer Channel boards, so check which one your board needs.
Two more checks before mounting:
If anything does not line up, stop and check with the manufacturer or a shop. Forcing mismatched parts together can damage the inserts.
Bindings are made in left and right versions, and it is easy to mount one backward. A few clues help:
Next, decide which end is the front. A regular rider leads with the left foot, so the left binding goes toward the nose. A goofy rider leads with the right foot, so the right binding goes toward the nose. Our stance guide has quick tests if you are not sure which you are.
Use the screws, washers and discs that came with your bindings, or official replacements for that model. Burton’s guide warns: “Only use the hardware that was included with your bindings.” Screws that are the wrong length or thread can damage the inserts or push through into the board.
Do not use a power drill or impact driver. Burton’s mounting guide says: “Never use power tools to tighten your binding hardware.” There is no single correct screw torque for every binding and board, so follow your manual. If you would rather not do it yourself, a shop can mount your bindings.
Work on a clean, padded surface with the base protected.
These steps follow the disc-binding method in Burton’s and Union’s guides. Channel and EST bindings use different hardware, so follow their own manuals.

A short summary; the detail lives on its own page.
Once the bindings are secure, five settings decide how they feel. Each one is covered step by step in our guide to dialing in mounted bindings.
Getting in and out of your bindings on the hill is a separate skill, covered in how to strap in and ride away.
When you change bindings, use the hardware that came with the new pair and follow its manual. When you move bindings to another board, check that board’s mounting pattern first; it may need a different disc or hardware. Riders who swap one pair of bindings between boards should remount and recheck them each time, as our guide to owning more than one board explains.
Keep the receipt handy if the board is new. Burton’s setup guide notes that most retailers will not accept a snowboard for return once bindings have been mounted, even if it was never ridden.
Run through this before your first run.
If anything about the setup feels wrong, a snowboard shop can check it, and an instructor can suggest stance changes once they have seen you ride.
In this series
Common questions
Check that the bindings fit your board’s mounting pattern, place the lead-foot binding toward the nose with the ladder straps on the outside, set the disc at your starting angle, start each screw by hand and tighten them evenly in a cross pattern with a hand screwdriver.
Most can, with the right disc, but not all. Burton’s EST bindings are designed for The Channel, and step-in bindings also need matching boots. Compare your board’s pattern (4x2, 4x4, 3D or Channel) with the patterns your binding supports.
Use Channel hardware: Union’s guide describes four screws and four standard washers for its disc bindings, and Burton’s EST bindings mount directly into the channel with two screws each. Check whether your board needs M5 or M6 hardware, and follow your binding manual.
Goofy riders lead with the right foot, so mount the right binding at the nose end of the board and the left binding at the tail. Everything else, including hardware and tightening, works the same way as a regular setup.
Unscrew the mounting screws with a hand screwdriver, keep all the hardware together and inspect the inserts. If an insert spins or will not hold a screw, have a technician repair it before you mount anything else.
Related guides
Fine-tune angles, stance width, straps and forward lean.
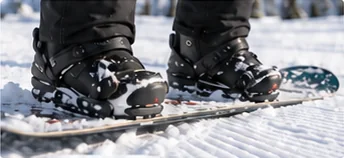
Fasten and release your bindings safely and get a snug, secure fit.

Find out if you ride regular or goofy and how to stand on a board.