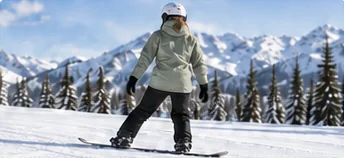
How to ride switch on a snowboard
Learn to ride and turn with your opposite foot forward.
Next-level skills
Build step by step
To learn tricks on a snowboard, start on ordinary groomed runs with switch riding, ollies and butters, then move to the smallest park features, and only then add spins and grabs, ideally with a freestyle coach. This page maps that order and links a guide for every step.
At a glance
Before this guide
Most of the groundwork happens on quiet groomed runs, long before you drop into a park.
The short answer to how to do tricks on a snowboard: learn them in a fixed order, from the ground up. Ride switch, pop ollies and butter on easy groomed terrain first. Then try the smallest jumps and boxes in the park, and only add spins and grabs once your straight airs and slides are calm and repeatable. A qualified freestyle coach speeds up every stage.
The order matters because each skill feeds the next. A 180 lands switch, so it needs switch riding. A 360 needs clean 180s and straight airs. Rails need the flat, centered stance you learn from presses. We suggest this sequence:
| Stage | Where to practice | Guide |
|---|---|---|
| 1. Riding with your other foot forward | Easy groomed runs | Learn to ride switch |
| 2. Popping off the tail and nose | Gentle, quiet groomed runs | Ollie and nollie basics |
| 3. Presses and on-snow spins | Gentle groomed runs | Buttering, presses and tripods |
| 4. Straight airs | Smallest jumps in the park | Your first park jumps |
| 5. Sliding features | Low, wide ride-on boxes | 50-50s and boardslides on boxes |
| 6. Half rotations | Snow first, then small jumps | Frontside and backside 180s |
| 7. Full rotations | Small jumps, with a coach | Building toward a 360 |
Grabs and shifties slot in once straight airs feel routine (see below). Throughout the whole sequence, it helps to film your runs so you can review them with a friend or coach.
Parks have their own signs, sizes and etiquette. Learn them on your first visit, before you hit anything.
If you want to know how to ride park on a snowboard, start with the signs. NSAA’s ski safety site explains that US terrain parks are marked with an orange oval and that features are labeled by size: XS (extra small), S (small), M (medium), L (large) and XL (extra large). It adds that “XS parks are a great place to start” and that most ski areas have a small, entry-level progression area. Other countries and resorts can use different systems, so read the signs wherever you ride.
NSAA and Colorado Ski Country USA both teach the Park Smart messages:
NSAA also advises riding through a park slowly first while you watch experienced riders, notes that most features can be ridden around, and asks riders to clear the landing quickly after a jump. A snug helmet with the strap done up belongs on every park lap, though NSAA is careful to say helmets can’t stop every injury.
Switch, pop and presses build the balance every park trick depends on.
Flatland tricks are the answer to how to start doing tricks on a snowboard without going near a jump. PSIA-AASI’s Freestyle Specialist Performance Guide, which sets out what freestyle instructors must demonstrate, lists ollies and nollies, butters and nose or tail presses among the entry-level snowboard tasks, alongside switch riding. That is a useful hint about where to begin.
Pick a quiet edge of the run for these drills. Riders coming down need to see you in time, which is why NSAA’s Responsibility Code tells everyone not to stop where they block traffic or can’t be seen from uphill.
Straight airs and simple slides on the smallest features come before anything that spins.
Your first park session should be about control, not height. On a small jump, the aim is a straight air with enough pop to reach the landing and ride away on your feet. PSIA-AASI’s guide describes a good straight air as one with a clean trajectory from lip to landing. Our guide to approaching, hitting and landing small jumps explains each part of a jump and how to inspect it first.
Boxes and rails are a separate branch. Start with 50-50s on low, wide ride-on boxes, where the PSIA-AASI guide’s standard is a board that stays flat and centered for the whole feature. Boardslides come after. See how to hit boxes and rails for choosing features and getting off cleanly.
Change one thing at a time: a new feature, a bigger size or a new trick, never all three at once.
Rotation starts on the snow, then moves to the flat, then to small features.
Spins are named by how far you rotate (180, 360, 540 and so on) and by direction. On a frontside spin your chest leads toward the direction of travel; on a backside spin your back leads. Which one is clockwise depends on whether you ride regular or goofy, which is why riders use frontside and backside instead of left and right.
PSIA-AASI’s guide sums up the air 180 as “set speed, then pop and spin,” and lists starting the spin before the pop as a fault. For a 360 it describes rotation that happens mostly in the air, a pop at the lip while the upper body turns, and spotting the landing before touching down. A sensible route:
Grabs add style to straight airs, and they rely on a strong knee tuck.
A grab means holding part of the board in the air. PSIA-AASI’s guide describes a basic grab as “bringing the equipment to the hand, and the hand to the equipment,” held for a clear moment, then released in time to land in the right part of the landing. In practice: lift your knees to bring the board up, rather than folding at the waist to reach down.
Common grabs, as riders generally describe them:
A shifty isn’t a grab. You twist the board a little under you in the air while your upper body stays steady, then straighten it before landing. It’s good practice for the upper and lower body separation that spins need.
Build grabs in stages: the grab position standing still, then with small ollies on a groomed run, then on small straight airs. Named advanced tricks, such as the Cloud 9, inverted tricks and bigger spins, sit well beyond this progression and should only be learned in person with a coach.
A good coach is the safest shortcut through every stage of this progression.
NSAA recommends a park-specific lesson for newcomers, and Colorado Ski Country USA notes that many ski areas have instructors certified in freestyle terrain instruction. In the US, PSIA-AASI’s Freestyle Specialist certificate has three levels: FS 1 covers extra small to small park features, FS 2 extra small to medium, and FS 3 extra small to large. Other countries have their own instructor bodies, so ask your resort’s snowsports school what freestyle coaching it offers. Our guide to finding the right snowboard lesson can help.
Video is a useful companion to coaching. PSIA-AASI lists video analysis among the activities used to assess freestyle instructors, and a short clip of your own riding often shows what you can’t feel, such as leaning back or spinning before you pop. Only film from safe spots away from landings and in-runs.
This page explains the order, but reading it doesn’t make you ready for any particular feature. Progress when your current step feels routine and a coach agrees.
Practice goals
Checking a box records your practice. Ask your instructor when you are ready to progress.
In this series
Common questions
Start with riding switch, ollies and simple butters on easy groomed runs. They build the balance and pop every other trick needs. Park features come after, beginning with the smallest ones and ideally with coaching.
A method is a front-hand grab on the heel edge, with the board pulled up behind you and your knees bent. Build it from a strong knee tuck on small straight airs, and let go in time to spot the landing.
Start with ground 180s on the snow, then small ollie 180s on the flat, then take them to small jumps once they are consistent and a coach agrees. Set your speed, pop, then spin. 360s come after 180s are solid in both directions.
In the air, twist the board a little under you while your upper body stays steady, then bring it back straight before landing. Practice with small ollies on a groomed run first.
For a tail grab, tuck your knees and reach the tail with your back hand; for a nose grab, use your front hand on the nose. Bring the board up to your hand rather than bending down, and release early enough to land centered.
It isn’t required, but NSAA recommends a park-specific lesson for newcomers, and many ski areas have instructors certified in freestyle terrain instruction. A coach helps you choose features and progress safely.
Up next
Learn to ride and turn with your opposite foot forward.
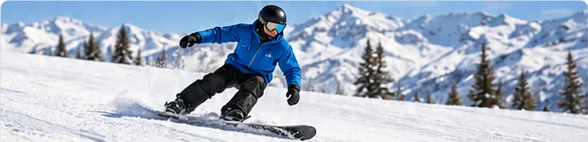
How park jumps work and how to start small with coaching.
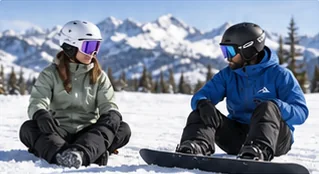
Find a good place to learn nearby and compare lessons before booking.