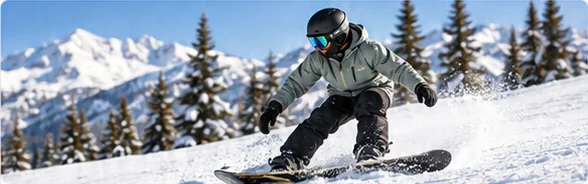
How to snowboard in powder
Ride soft, deep snow with balance, flow and a partner nearby.
Next-level skills
Education first
You learn how to backcountry snowboard in this order: avalanche education first, then trips with trained partners or a qualified guide, with the forecast, rescue gear and practice in place before you ever leave the resort. This page is an orientation, not a guide to going out alone.
Part of Carving and all-mountain riding
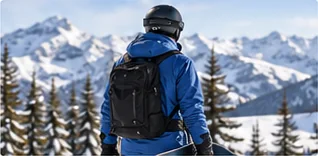
At a glance
Before this guide
Backcountry riding is a team activity built on training, not a solo adventure.
The first step in how to backcountry snowboard is not a piece of gear or a riding technique, but training and the right people. The backcountry is terrain outside a resort’s managed boundary: no avalanche control, no grooming, no ski patrol nearby and often no phone signal. If something goes wrong, the people you are with are the rescue team.
Strong riding is needed but not enough. Solid edge control, from clean carving on groomers through steeps and powder, gets you down the slope; it says nothing about your ability to recognize avalanche terrain or carry out a rescue.
Avalanche education is a lifelong process that starts before your first backcountry trip.
Avalanche.org, the US avalanche center network’s site, sums up the starting point as “Get the Forecast, Get the Gear, and Get the Training,” and calls avalanche education “a life-long process.” Its education pages offer a free interactive tutorial and a “Know Before You Go” awareness video, and help you find avalanche educators near you.
A typical path looks like this, although names and structures differ by country:
Find a course through the avalanche center or recognized training body where you plan to ride. Course content, prerequisites and costs vary by provider and country, so check with the provider directly.
Good decisions start at home, with the forecast and a plan you can change.
Some days are simply not suitable for avalanche terrain. Recognizing those days and choosing a lower-risk objective, or staying at the resort, is a core backcountry skill.
Rescue equipment only works if everyone carries it and knows how to use it.
The standard personal avalanche rescue kit is an avalanche transceiver (beacon), a probe and a shovel, carried by every member of the group. Your avalanche course will teach you how to use them together.
Some riders also use avalanche airbag packs. These are an extra layer of protection, not a substitute for education, good decisions or the core rescue kit. Read the manufacturer’s manual and practice deploying one if you carry it.
A splitboard lets you climb uphill without carrying your board.
A splitboard is a snowboard that separates into two ski-like halves. With climbing skins attached to the base, you walk uphill on the halves, then join them back together to ride down. It is how many snowboarders travel in the backcountry without boot-packing or snowshoes.
A splitboard makes backcountry terrain easier to reach. It does not reduce avalanche risk, so the training above still comes first.
Tree runs inside the boundary are a useful step with their own hazards.
Learning to snowboard through trees and glades inside the resort boundary builds useful skills, but it has its own hazards, including tree wells and deep snow immersion. The NSAA’s tree well and deep snow safety page says to “ALWAYS ski or ride with a partner within viewing distance.”
“Off-piste” is used differently in different places: it can mean ungroomed terrain inside a resort or terrain outside it. Resort exit gates lead to uncontrolled terrain; do not pass through them without the training, equipment and partners described above.
Hiring a qualified mountain or backcountry guide is one of the best ways to experience the backcountry while you are still learning. A guide makes terrain and route decisions based on professional training and local knowledge, and many will explain their thinking so you learn as you go. Check the guide’s qualifications and the requirements of the country or land manager where you will ride. Guided days sit alongside your own avalanche education rather than replacing it.
If you want to become a backcountry snowboard guide, the route runs through national guiding associations. In the US, the American Mountain Guides Association’s Ski & Splitboard Guide Program is open to splitboarders and, as its page read when checked 23 September 2026, lists a Ski Guide Course, a Ski Mountaineering Skills Module, an Advanced Ski Guide Course and Assistant Exam, and a Ski Guide Exam, with prerequisites including current CPR, Wilderness First Responder and professional-level avalanche training. Other countries have their own bodies and requirements, so check with the guiding association where you want to work.
Practice goals
Checking a box records your learning, not readiness. Only trained partners, guides and course instructors can judge that.
Common questions
Start with avalanche awareness material and an introductory avalanche course, then gain experience with trained partners or a qualified guide. Strong riding inside a resort is needed but is not enough on its own.
A splitboard separates into two halves that you use with climbing skins to walk uphill, then rejoin to ride down. Follow the manufacturer’s instructions for setup, practice transitions in safe terrain, and complete avalanche training before using one in the backcountry.
Stay inside the resort boundary, ride with a partner within viewing distance, keep your speed down and look at the gaps rather than the trees. Be aware of tree wells, where loose snow around a trunk can trap a rider.
The terms are used differently in different places. Off-piste can mean ungroomed terrain inside a resort or terrain outside it. Anything outside the managed boundary is uncontrolled for avalanches and needs avalanche training, rescue equipment and qualified partners or a guide.
Through a national guiding association. In the US, the AMGA’s Ski & Splitboard Guide Program includes a series of courses and exams with first aid and professional avalanche training prerequisites. Requirements differ by country, so contact the guiding body where you want to work.
Up next
Ride soft, deep snow with balance, flow and a partner nearby.
Step up to steeper runs gradually, with speed control on every turn.
Read snow reports, cover, cold and visibility before you ride.