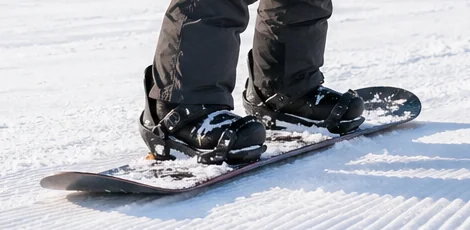
How to butter on a snowboard
Press, flex and pivot your board for balance and style.
Next-level skills
Pop off the tail
To ollie on a snowboard, shift your weight to your back foot so the tail bends, lift your front knee, spring off the tail and tuck both knees, then land flat and centered. Learn it on a gentle, quiet groomed run, well away from park features.
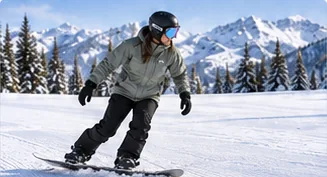
At a glance
Before this guide
Learn the ollie on easy, open groomed terrain before you use it anywhere near a feature.
How to ollie on a snowboard comes down to one idea: bend the tail, then let it spring you off the snow. It’s one of the first freestyle skills most riders learn, because it lets you create your own lift. You’ll use it to hop small bumps, get extra air off rollers and, much later, to take off from jumps with more control.
You’re ready when you can ride easy runs in control, link turns and stop where you choose. Pick a gentle, wide, quiet run with good visibility and practice at the side, out of the traffic line. Avoid spots just below a ridge or roller: people coming over the top won’t see you in time, and NSAA’s Responsibility Code is explicit about stopping only where you can be seen from above.
Put on a helmet that fits and fasten the strap. Early ollies often end in backward falls when the board shoots out in front, so start with small hops at slow speed. A freestyle lesson from a qualified instructor is a good way to learn the timing safely.
The pop comes from bending the tail and letting it spring back.
A snowboard flexes like a spring. In an ollie, you load the tail by moving your weight toward your back foot and pressing it down, then release it so the board springs you upward. Your legs then lift and tuck to bring the board off the snow.
How much pop you get depends partly on the board. Softer, more flexible boards are usually easier to bend; stiffer ones take more effort. Technique still makes the bigger difference.
Build the movement in small steps: standing, then sliding slowly, then adding more pop.
That last step matches how PSIA-AASI’s Freestyle Specialist Performance Guide assesses instructors: ollies and nollies standing still on the flat, straight down the fall line and across the hill, from both a natural and a switch stance, with the whole board leaving the snow.
Some riders find it helps to count: one to load the tail, two to pop, three to land. Keep your shoulders roughly in line with the board and your eyes up. Throwing your arms or twisting your upper body makes the board turn in the air.
A good landing is flat, centered and absorbed through bent knees.
If you keep landing on the tail and sitting down, you’re probably staying back too long. Move your weight forward to center as you tuck.
Height comes from timing and tuck, not from leaning further back.
Once small ollies are consistent, you can work on height. We suggest changing one thing at a time:
Avoid adding speed to get more air while you learn. Speed makes every mistake bigger.
A nollie is an ollie off the nose instead of the tail.
Once your ollie is consistent, try the nollie: shift your weight toward the front foot, load the nose, lift the back foot and spring off the nose. It feels less natural because you’re pressing forward while sliding downhill, so start even smaller and slower. Comfortable riding with your other foot forward helps, since a nollie is similar to an ollie with the other end leading.
Solid ollies and nollies feed straight into taking off from small jumps and into your first ollie 180s on the flat. Reading about them doesn’t mean you’re ready for park features: build up in person on the smallest terrain, ideally with a qualified freestyle coach. Our guide to the order of freestyle skills shows the bigger picture.
Most ollie problems come from timing or weight in the wrong place.
Practice goals
Checking a box records your practice. Ask your instructor when you are ready to progress.
Common questions
Move your weight toward your back foot to bend the tail, lift your front knee, then spring off the tail and tuck your knees. The pop comes from the tail flexing and springing back.
Load the tail deeper, snap off it quickly and tuck your knees harder, rather than leaning further back or adding speed. Build height gradually on easy groomed terrain once small ollies are consistent.
Shift your weight toward your front foot to load the nose, lift your back knee, spring off the nose and tuck. Start smaller and slower than your ollies, because pressing forward while sliding downhill feels less natural.
Usually because your weight stays too far back after the pop. As you tuck, bring your weight back to the middle of the board so you land flat on both feet.
Yes. A stiffer board takes more effort to bend, so load the tail with a deeper knee bend and keep the timing sharp. Softer boards are usually easier to pop, but technique matters more than flex.
Up next
Press, flex and pivot your board for balance and style.
How park jumps work and how to start small with coaching.
Rotate half a turn and land riding switch, starting on the snow.