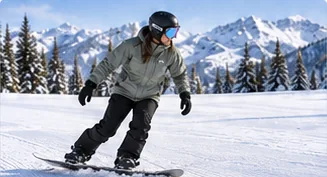
How to ollie on a snowboard
Use the tail of your board to pop off the snow in control.
Next-level skills
Start small
To do jumps on a snowboard, start on the smallest features in the park, watch others and inspect the jump, ride a straight approach with a flat board, pop gently off the lip, tuck your knees and land on the landing slope with both feet. A freestyle coach makes each step safer.
At a glance
Before this guide
Your first jumps should be straight, small and boring. That’s the point.
If you want to know how to do jumps on a snowboard, here is the short version: learn to pop with ollies on a groomed run, then ride the smallest jumps in the park with a straight approach, a flat board and a calm landing, and repeat until every landing feels routine. Only then add grabs or spins.
For beginners, a good sequence is:
PSIA-AASI’s Freestyle Specialist Performance Guide describes a good straight air as one with enough pop to control the air through the landing zone and a clean trajectory from lip to landing. Height isn’t part of that description; control is.
Before you hit anything, learn how the park is signed and how people share it.
In US resorts, look for the orange oval that marks a terrain park and for size labels running from XS up to XL. NSAA’s terrain park page calls XS parks a great place to start, so find the extra-small jumps first, even if you’ve ridden bigger ones elsewhere. Other countries and resorts may label things differently; the signs at the park entrance are the ones that count.
Here is how the five Park Smart messages (Start small, Make a plan, Always look, Respect, Take it easy) translate to a single jump:
A park lesson is the best way to learn all of this in person; our advice on booking the right kind of lesson explains what to ask for. Put your helmet on and do the chin strap up before every park lap, but don’t let it change how much risk you take: NSAA’s helmet guidance is clear that helmets can’t prevent every injury.
Knowing the shape of a jump is how you make a plan for it.
| Part | What it is | What to check |
|---|---|---|
| Approach (in-run) | The slope you ride down to build speed | Where riders start and how straight their line is |
| Take-off (lip, kicker) | The ramp that sends you into the air | How steep it looks and whether it’s rutted or icy |
| Table (deck) | The flat top on many smaller jumps | How long it is; coming up short lands you here |
| Knuckle | Where the table meets the landing | Never stop just below it, where you can’t be seen |
| Landing | The downhill slope you aim for | Its length and surface |
| Run-out | The flatter area where you slow down | Room to stop and move aside |
NSAA suggests riding through the park slowly first while you watch experienced riders. Stand at the side, out of the way, and watch a few people use the jump, then roll past it or over it slowly if the shape allows. NSAA also notes that most features can be ridden around, so if a jump doesn’t feel right, skip it. Conditions change daily, so inspect again each session.
A controlled, straight approach and a balanced stance matter more than height.
Aim for the landing slope, on both feet, with bent knees.
If you fall, get up and move out of the landing and run-out as soon as it’s safe. Our guide to falling safely and getting back up covers the basics.
Move up only when the current size feels routine, and ask a coach before you do.
More air usually means more speed and bigger features, which raise the consequences of every mistake. Before moving up a size, ask yourself honestly:
If any answer is no, stay where you are. Nerves are a useful signal, not something to push through. Many riders find fear eases with repetition on a jump that’s well within their ability, a coach beside them and an honest “skip it” option. Tiredness, flat light, icy or slushy snow and busy parks are all good reasons to stop for the day; see how to judge the day’s conditions.
When straight airs feel solid, grabs and a first half-spin are the usual next steps. Our freestyle learning roadmap shows how they fit together.
Most bad landings start on the approach, not in the air.
Practice goals
Checking a box records your practice. Ask your instructor when you are ready to progress.
Common questions
Keep your weight centered, bring your knees up slightly in the air, spot the landing and touch down on both feet with the board pointing straight down the landing slope. Bend your knees and ankles to absorb the impact, then ride out and clear the landing.
Height should come last. Make every landing on the smallest jumps controlled first, then add a stronger pop and tuck. Bigger features and more speed raise the risk, so move up gradually and with a qualified freestyle coach.
It depends on the jump, the snow and the conditions, so there’s no single answer. Watch other riders, roll past the feature first and ask a coach. Overshooting the landing is more dangerous than landing on the table.
Treat fear as information. Start on the smallest features, practice ollies on groomed runs, take a park lesson and only move up when the current size feels routine. Skipping a jump that doesn’t feel right is always an option.
Once you can control speed, stop reliably and ollie on groomed runs, you can start on the smallest park features. NSAA says XS parks are a great place to start and recommends a park-specific lesson.
Up next
Use the tail of your board to pop off the snow in control.
Rotate half a turn and land riding switch, starting on the snow.
Find a good place to learn nearby and compare lessons before booking.